Amidst all the Windows 11 shenanigans, Microsoft also shared the . One of the surprising mentions on the specifications sheet was the requirement of a Trusted Platform Module (TPM). Earlier, TPMs were discrete chips soldered to a computer’s motherboard and were mostly available for business users. However, newer TPM implementations from AMD, Qualcomm, and Intel integrate TPM functionality directly into the CPUs.
However, most people aren’t even aware of what TPM is and if there is one in their PC. Nobody, apart from power users or IT administrators, checks for TPM listing in a specifications sheet. Computer brands don’t highlight it like processor, storage, RAM, etc. in their marketing collateral. So, what really is a TPM?
What is a Trusted Platform Module (TPM)?
TPM technology is designed to provide hardware-based, security-related functions. A TPM chip is a secure crypto-processor that helps in generating, storing, and limiting the use of cryptographic keys.
Windows 10 offers a myriad of security features like Device Guard, Windows Hello for Business, BitLocker Drive Encryption, et al. and to achieve many of these security enhancements, Windows 10 makes extensive use of the TPM. Windows 11 is expected to take it further with a cumulative security impact of new built-in security features as well as a TPM.
Check the TPM Management console

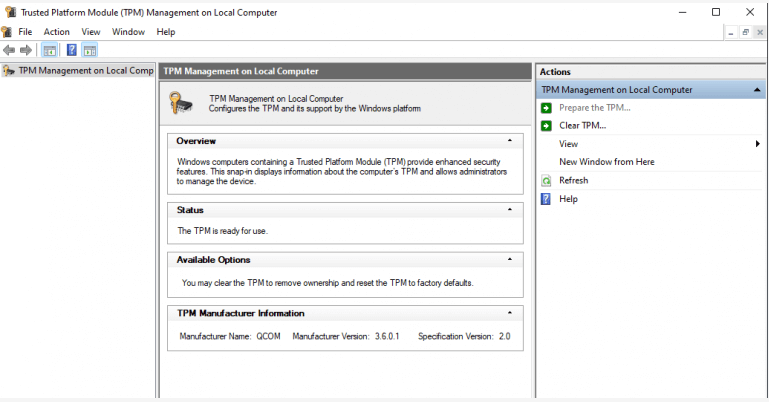
Open the Run command (Windows + R), type tpm.msc, and click OK or hit Enter. Once the Trusted Platform Module Management console opens, check out the status.
“The TPM is ready for use.” Yay!
“Compatible TPM cannot be found on this computer.” Uh-oh.
There will also be the manufacturer information of the TPM chip. The screenshot is from a Surface Pro X, and hence Qualcomm is specified as the manufacturer.
If your TPM is confirmed, you are good to go. Check the PC Health Check app, and assuming other requirements are met, you’d get a green signal for a free upgrade to Windows 11 when it rolls out. However, even if you get the latter, it’s not all over. Read on.
Using BIOS or UEFI

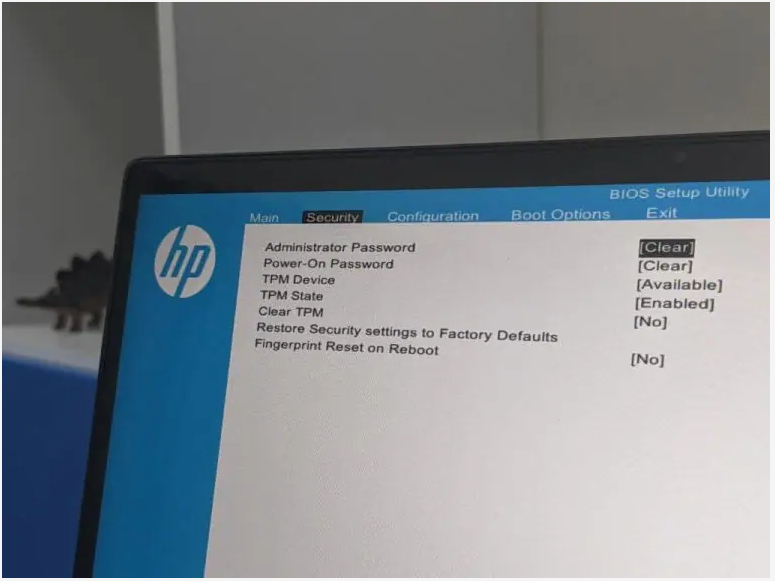
There is a chance that you’d need to enable the TPM from BIOS or UEFI. These are not straightforward steps since the BIOS interface is different for different OEMs. To do this, you can contact your manufacturer’s support channels, else follow these steps with approximation.
Restart your computer, and enter the BIOS or UEFI utility. Head to the Security section, and you’d find an option to enable the TPM if there’s one. Save, and exit the BIO utility.
You can also buy a TPM chip. It’s quite a hassle since you’ll have to figure out which one your hardware supports and the installation too requires some expertise. So, go this route only if you know your stuff and want to redeem your older system. And, of course, in true nod to our times, scalpers are already picking up TPM chips to create a shortage in the market.
Microsoft has shared that it will update the PC Health Check app and also offer guidance around enabling TPM via BIOS to allay such concerns. You can also try these alternate methods to check the TPM status to be sure.
Using the Device Manager

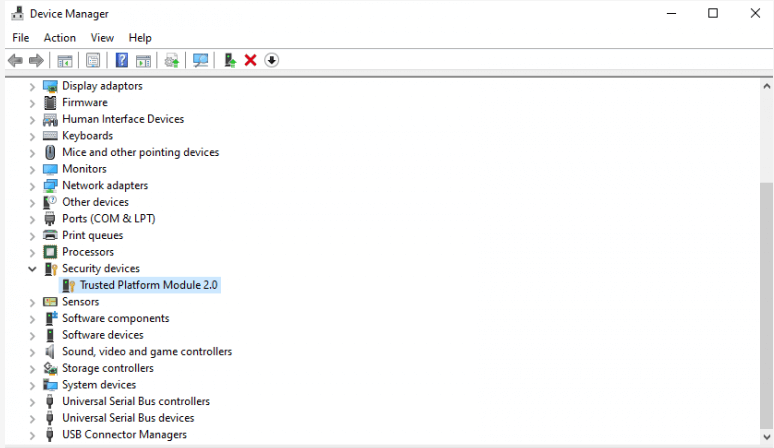
Open the Run command (Windows + R), type devmgmt.msc, and click OK or hit Enter. Once the Device Manager console opens, head to Security devices, and expand it.
If you’ve got a TPM, it will be listed here.
Using Command Prompt

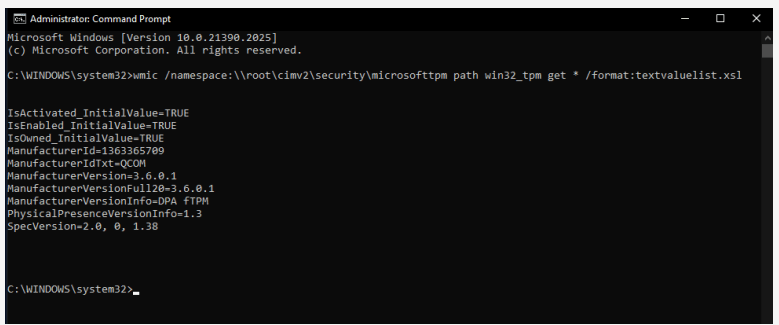
Press the Windows button on your keyboard or click Start, and type cmd. You’d get the Command Prompt, so click on Run as administrator to open the Command Prompt in elevated mode. Copy the following command, paste it at the prompt, and hit Enter.
wmic /namespace:\\root\cimv2\security\microsofttpm path win32_tpm get * /format:textvaluelist.xsl
The Command Prompt will return three values for TPM – IsActivated, ISEnabled, and IsOwned. If all the three are TRUE, you are good to go. If either of them returns No instance available, you’d have to address the specific issue.